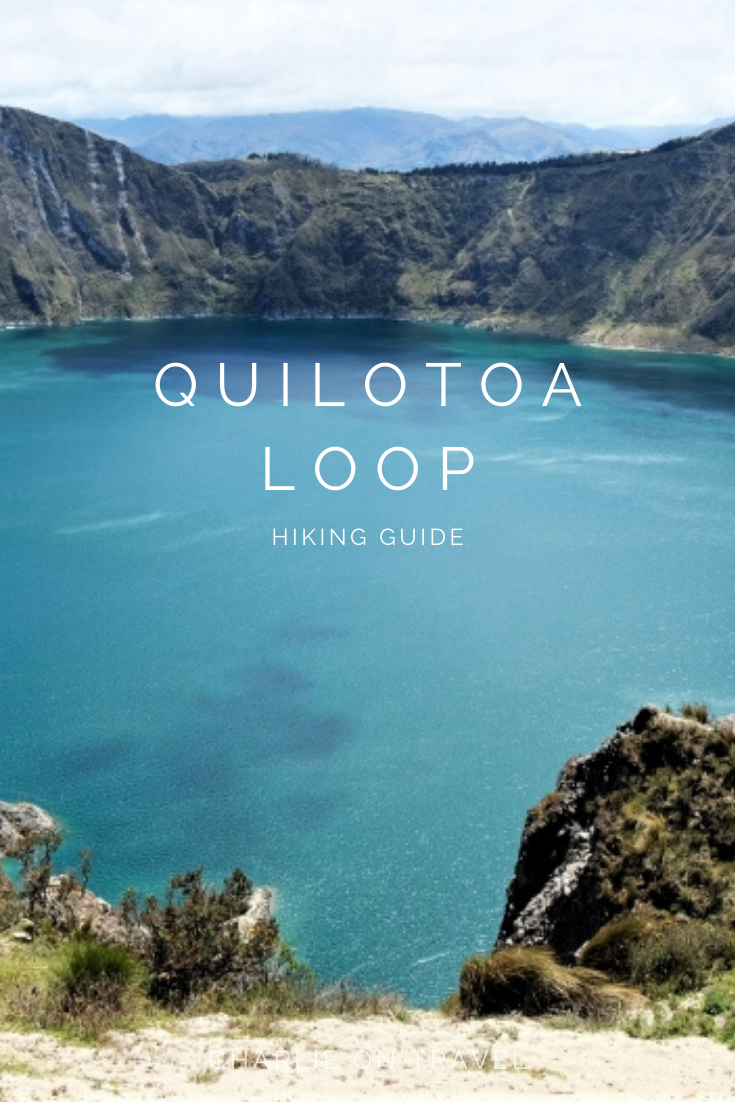
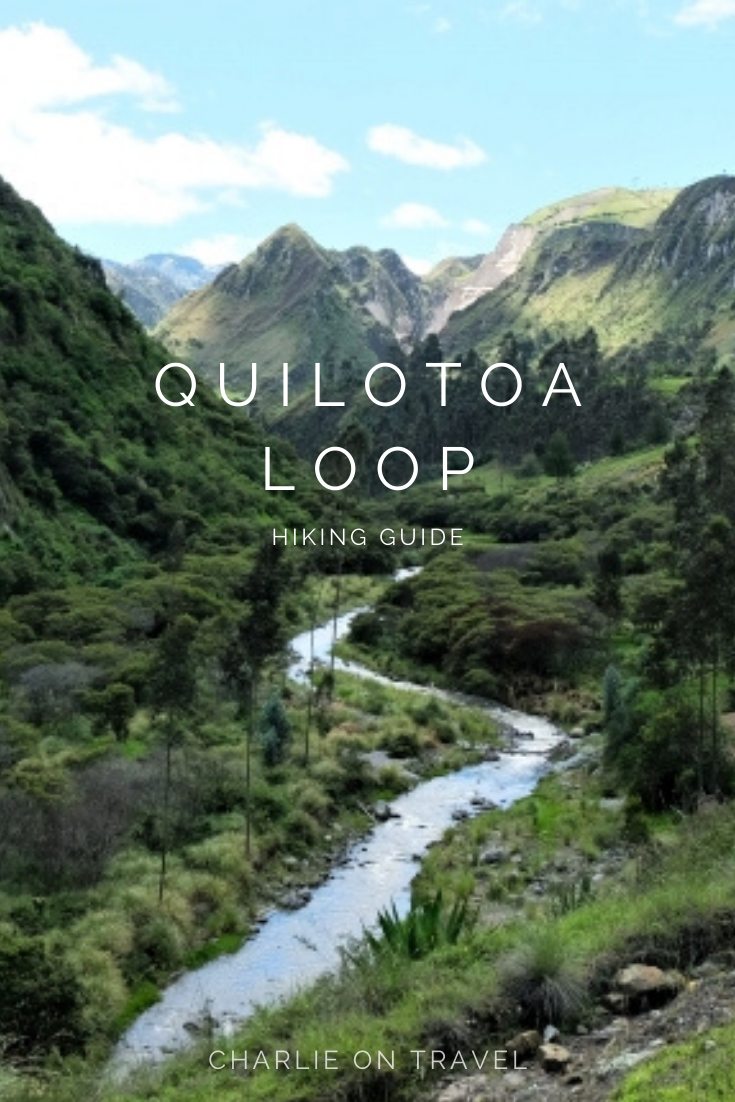
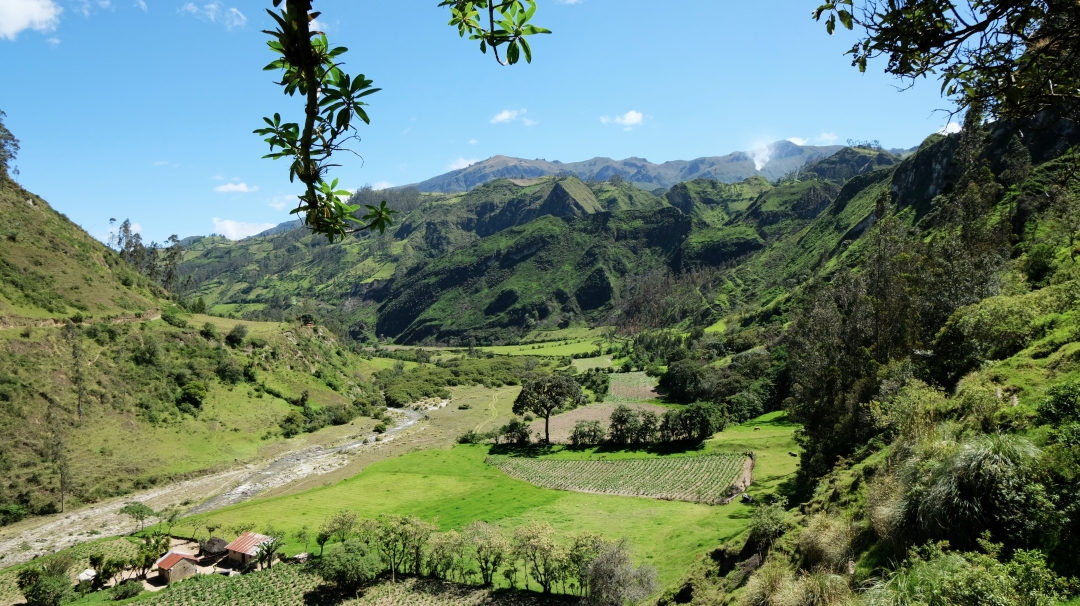
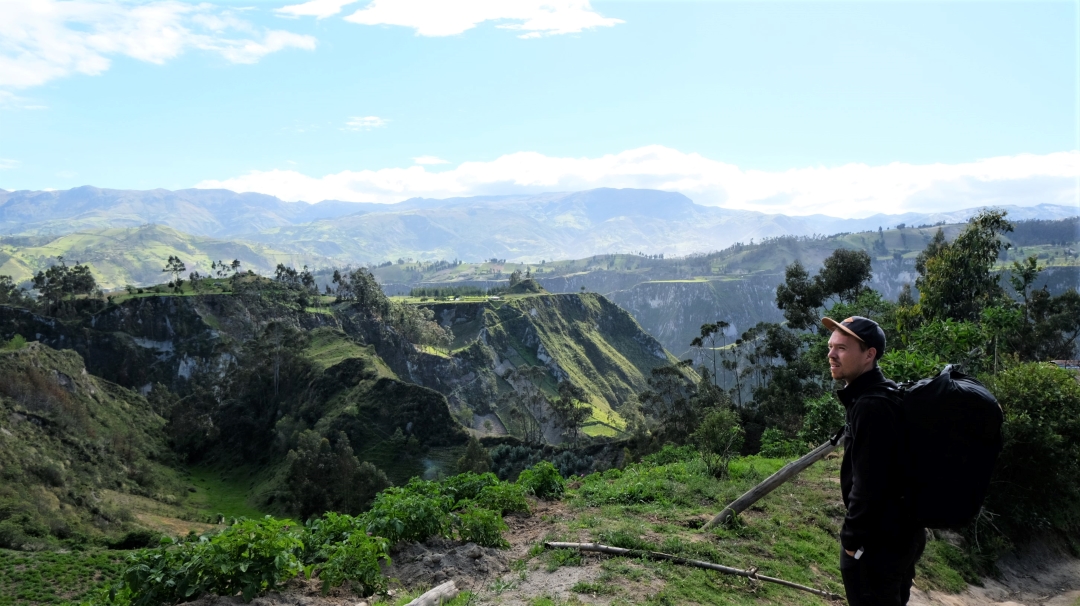
Hike your way through the Andes mountains, around the Quilotoa Loop in Ecuador. This 36km winding track takes you through green valleys as clouds descend on the mountain tops, past fluffy alpacas (though more sheep and cows than alpacas) and through traditional mountain villages.
In this Quilotoa Loop hiking guide, we share our experience trekking through the Andes, our recommendations for the best hostels on the Quilotoa Loop and what you need to pack, and most importantly the walking route.
How Long Is the Quilotoa Loop Hike?
The Quilotoa Loop hike is 36km total and can be done over 3 days, and many people do the hike in this time frame. We chose to do the hike over 4 days so we could have a rest day and relax at the wonderful Llu Llu Llama mountain lodge (you have to stay there) and celebrate Christmas there. We met other hikers who were spreading their hiking over 5 days.
Which Quilotoa Loop Hiking Route Is Best?
There are two ways to hike the Quilotoa Loop. The first is the loop from Sigchos to Isinlivi, onto Chugchilan and ending at the Quilotoa Lake. This option ends with a glorious finish of the bright blue crater lake. This is the route we took.
The second option is the reverse loop starting at the Quilotoa Lake and ending in Sigchos. This is supposedly the easier option as you’ll walk downhill from the lake on the first day instead of tackling the uphill to it on the last day. This stretch is the steepest part of the trek, but even on the reverse loop you’ll have to do some steep uphills on the second and third days of the hike.
I’d recommend the first option, starting in Sigchos and ending on a (literal) high at the Quilotoa Lake. This route feels so much more rewarding because you reach a triumphant finish with views of this huge aquamarine lake. If I’m honest, I’m also not sure that the reverse loop is much easier. There are steep patches on both directions, and coming from the lake down means you’re more at risk of feeling altitude sick.
Where To Stay on the Quilotoa Loop
The Quilotoa Loop has some excellent hostels and we had some of our most pleasant stays in Ecuador during the trek. We can recommend all the hostels we stayed in, but it’s worth noting that accommodation is in rural areas and can be less than luxurious though always comfortable. We chose a balance between the nicest and best value hostels on the Quilotoa Loop.
|
Day Before the Hike |
Hostal Tiana in Latacunga |
Before you start the hike, you’ll need to stopover in the small highway town of Latacunga. The colourful Hostel Tiana is the best in town and offers luggage storage for $1 per bag per day. Drop your bags here before starting the hike. A basic breakfast is included. Other options include Hostal Dulce Hogar, a small and sweet hostel with just a few rooms on the edge of town run by an elderly couple. |
|
Day 1: Bus from Latacunga to Sigchos and hike from Sigchos to Isinlivi (3-4 hours) |
Llu Llu Llama Mountain Lodge in Isinlivi |
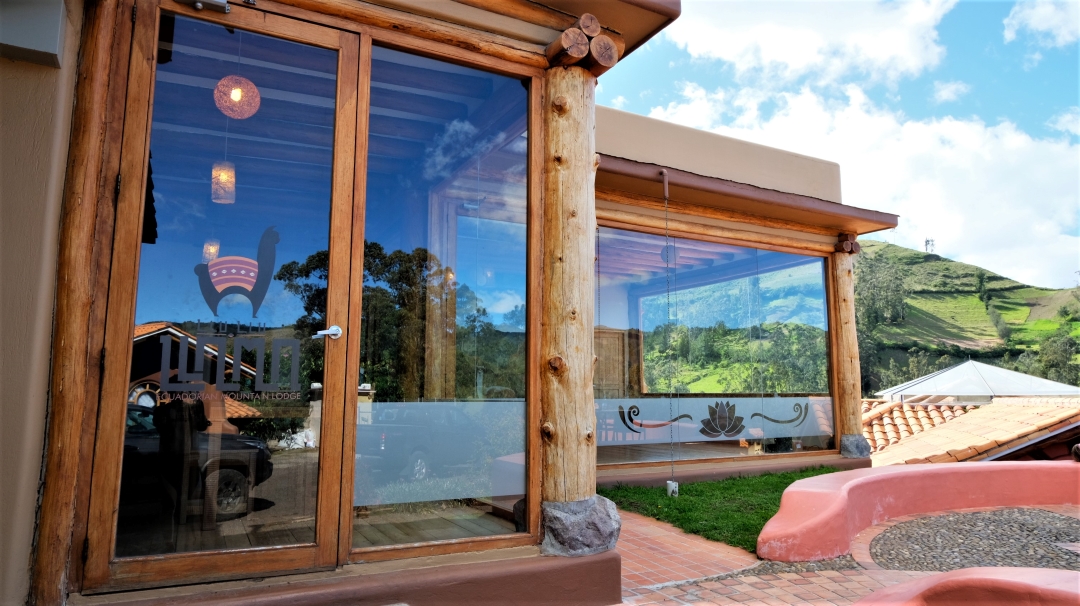
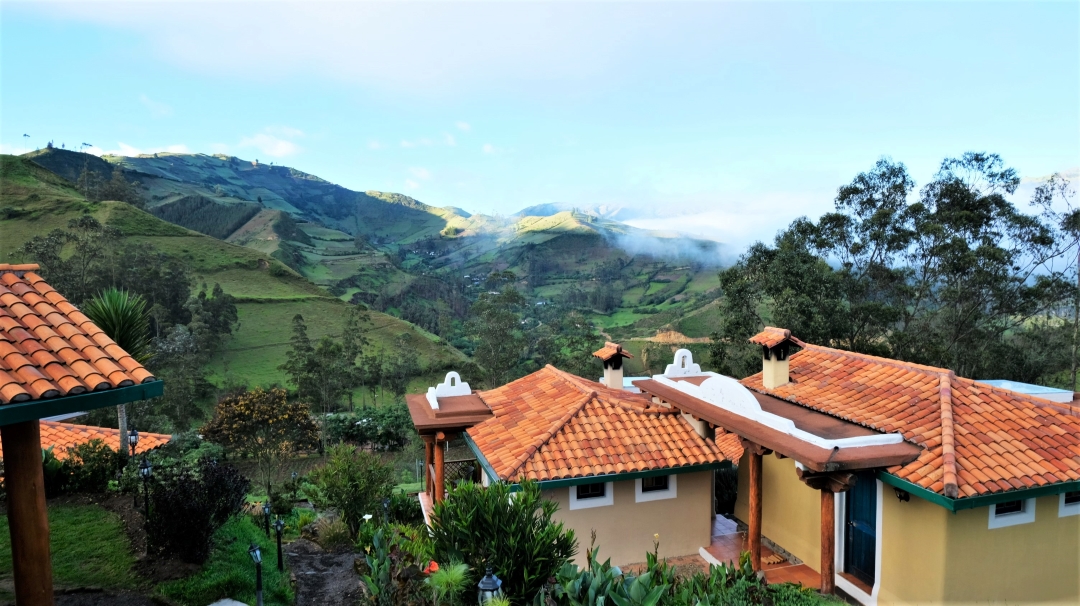
Llu Llu Llama is the best hostel we’ve ever stayed in! We stayed two nights and had a rest day here so we could enjoy being in such a nice place. This Ecuadorian mountain lodge has views of the lush, green Andes mountains and is very clean. It offers dorms in the loft, small private rooms at the back of the lodge and private cabanas with fireplaces and gorgeous views of the rolling hills. A jacuzzi, steam room and sauna is open 4:30-6:30PM every day and included in the price. A very good and wholesome breakfast and dinner is also included – and they bake their own bread. Vegetarian and vegan options available. There are a few other options in town, but I personally wouldn’t look farther than Llu Llu Llama. Book in advance, as this hostel is popular. |
|
Day 2: Hike from Isinlivi to Chugchilan (4-6 hours) |
Hostal Cloud Forest in Chugchilan |
Hostal Cloud Forest is the biggest and best value hostel in Chugchilan. Ask for a private room with a fireplace, as it gets cold at night. Breakfast and dinner is included. Vegetarian and vegan options available. Other options in town include the cute looking Mama Hilda’s, and the slightly more expensive El Vaquero which includes a jacuzzi and sauna. |
|
Day 3: Hike from Chugchilan to Quilotoa (4-6 hours) |
Hostal Chukirawa in Quilotoa |
Rest your achy legs after the final glorious day of the hike at Hostal Chukirawa by the Quilotoa Lake. Breakfast and dinner is included. Vegetarian options available. It is possible to go directly to Latacunga on the third day, but we’d recommend spending the night by the lake and instead just stopping by to pick up your bags from your hostel in Latacunga. Other options include the more homely Martita’s House Hostal. |
Important note! Hostels on the Quilotoa Loop usually only accept cash payments. None of the hostels accept card, but Llu Llu Llama does accept payment by PayPal. There are no ATMs on the Quilotoa Loop so be sure to bring enough money with you.
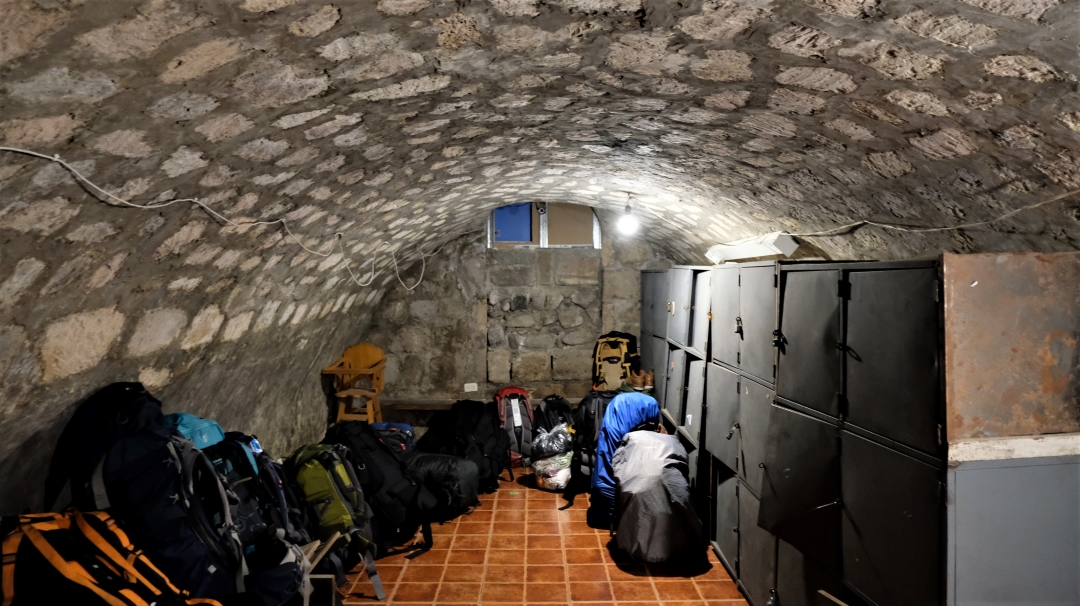
Bag storage! Store your backpack and anything you don’t need at the locker dungeon in Hostal Tiana in Latacunga. It costs $1 per day per bag and you’ll need to sign your bag in and out. I’d recommend taking anything valuable with you, including your passport. You’ll want to carry as little as possible on this hike though.
Quilotoa Loop Day-by-Day Hiking Route
The Quilotoa Loop hiking route is partially sign-posted but it’s better to read up on the walking route ahead of time as turnings are easy to miss. We recommend hiking the Quilotoa Loop from Sigchos and ending at Quilotoa Lake, and not the reverse loop.
The hostels have paper instructions for how to hike each stretch, so make sure to pick those up. However, though we made it through with these instructions, it’s better to download the Maps.me app for Android or IOS, which gives a more up-to-date hiking routes and shortcuts.
Day 1: Bus from Latacunga to Sigchos (2 hours) and Hike from Sigchos to Isinlivi (3-4 hours, 12km)
On the first day, head to Latacunga bus station and take a bus to Sigchos. Buses go regularly and you can check updated times with your hostel in Latacunga. We took the second bus of the day at 9AM. The bus is 2 hours and costs $2 per person.
In Sigchos, head south east towards the corner of town. You’ll reach an intersection with roads to Chugchilan and Isinlivi. Turn left here and follow the red and yellow signposts for Isinlivi. Follow the route downhill on the track and you’ll eventually reach a small church. Continue past the church and take the second right (not the one directly behind the church).
A few minutes down this next grassy track you’ll see a left turn marked with an arrow painted on a rock. Look out for this as it’s hard to spot. It’s only a small path. Follow the trail and turn right when you reach the road. You’ll quickly come to a left-hand corner with another trail leading to the right. Take this route until you reach the next road. Follow the road with the river on your left-hand side for 30 minutes.
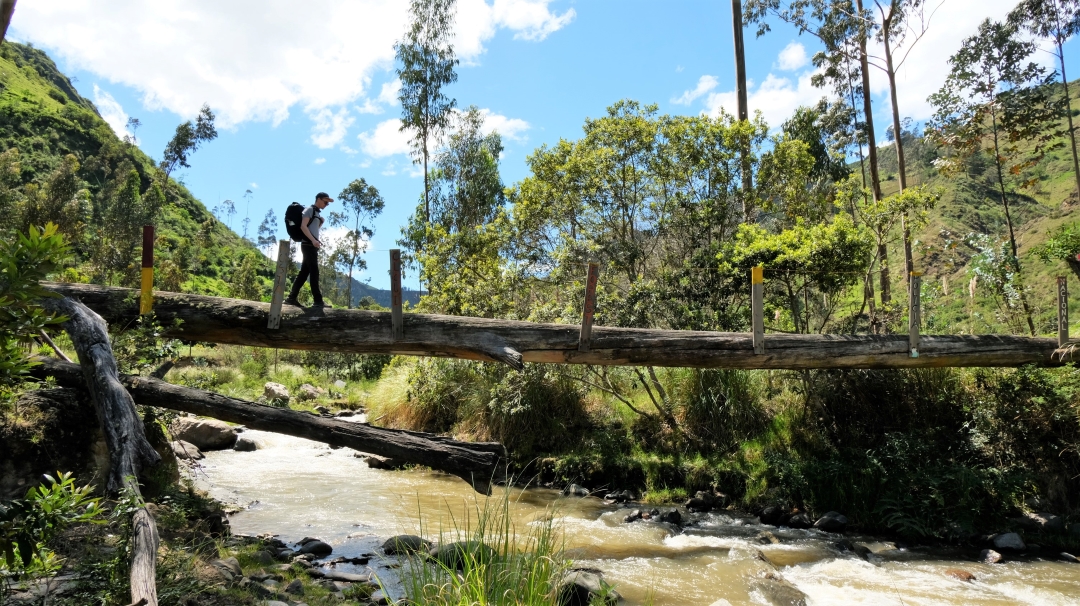
You’ll reach two houses. Turn left onto the grass driveway and past another red/yellow signpost. The trial will lead down to a river. Cross the bridge, turn right and walk along the river until you reach a muddy uphill path. It’s a narrow path with stepping stones in place because of how muddy it gets!
At the top of the muddy path, take a left on the road and then take a right at the next intersection. Follow the dirt road for four curves. There’s a steep and narrow grassy path on your left. We almost missed this, so keep a look out! This is the hardest part of the trail as it’s the steepest uphill. Follow the path upwards until you reach the road.
Turn right on the road and continue for 45 minutes to Isinlivi. We stayed two nights here at the wonderful Llu Llu Llama. This mountain lodge gets booked up, so make sure you reserve a room before you get to Isinlivi.
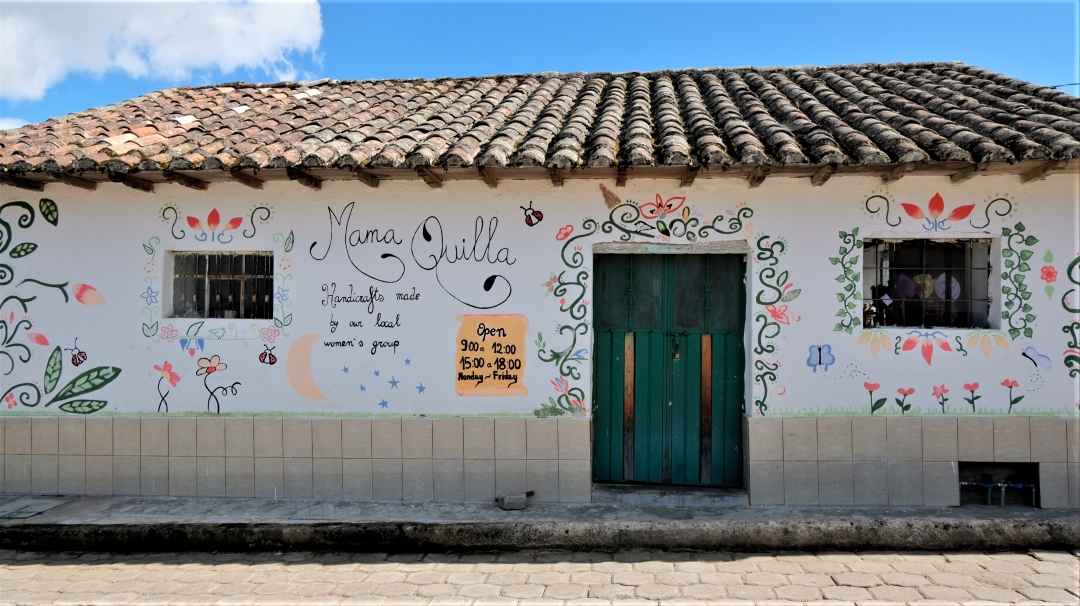
Local tip! When you’re in Isinlivi, check out Mama Quilla’s. This shop sells locally made handicrafts and artisan products made by the women’s group in the village.
Day 2: Hike from Isinlivi to Chugchilan (4-6 hours, 12.4km)
Day two is a moderately difficult hike. Start by taking the path down the left side of Llu Llu Llama past the kitchen and turn right. Follow the track down until you pass a small house on your left. Take the next left after the house onto a grassy track. Follow it down and you’ll reach a small bridge. Cross the bridge and take a right about 250m after onto a grassy verge.
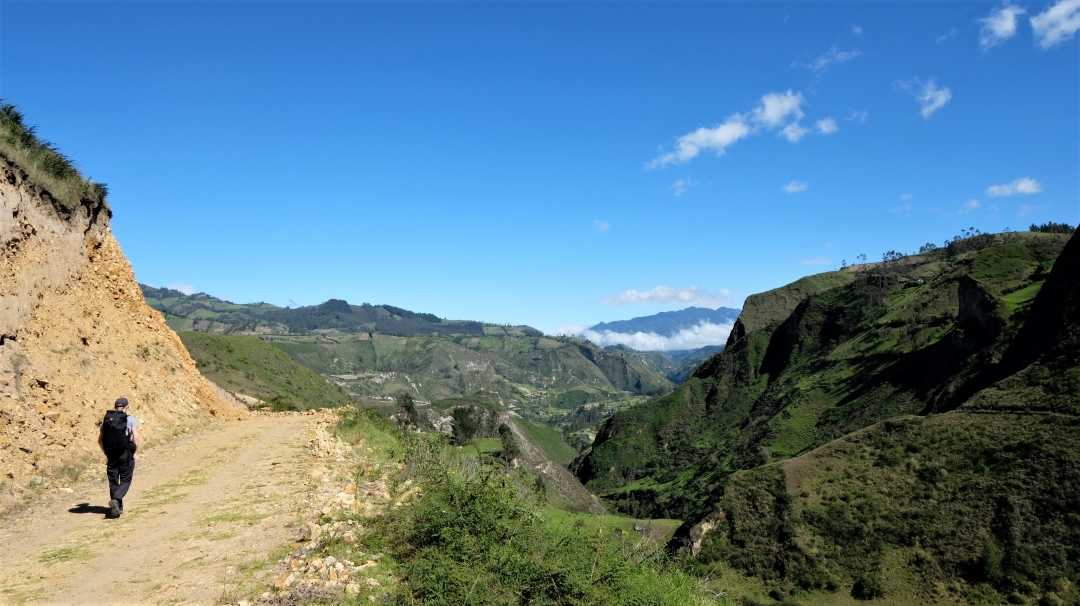
Follow this path along until you reach a dusty road track. Turn right onto the dirt road and follow it for 2km. At the end of the road, you’ll pass through a route with small white cliffs on either side. You’ll see a house to your left, but don’t go towards it. Turn right instead and take the sandy, rocky path downhill. There are no sign posts here but you’ll be going downhill into the valley for some time.

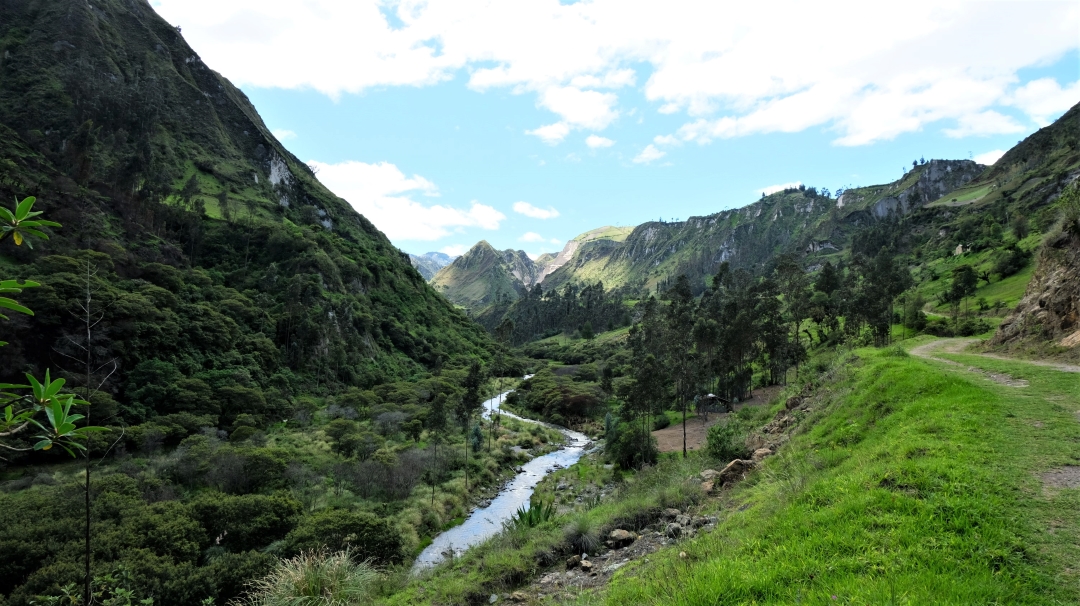
At the end of the descent, continue 50m until you reach a gate. Unhook the gate and go through. You should see a farm and you want to walk with the river on your right-hand side. Follow the river (the Rio Toachi) along, walking on the edge of the farmland. Continue for 1km and you’ll see a large boulder on your left. Continue on through the meadow until you reach an open field. Walk across it into a grassy area with eucalyptus trees.
Once you pass this area, you’ll reach a farm and see a hill in front of you. Take the small grassy track up the hill and follow it round to the right. The river should continue to be on your right-hand side. Eventually the path will lead you back down to the river where you’ll see a tree trunk log bridge with signposts to Chugchilan on the other side. Cross the bridge and follow the path with the river on your left-hand side. The path will lead through a gorgeous green valley.
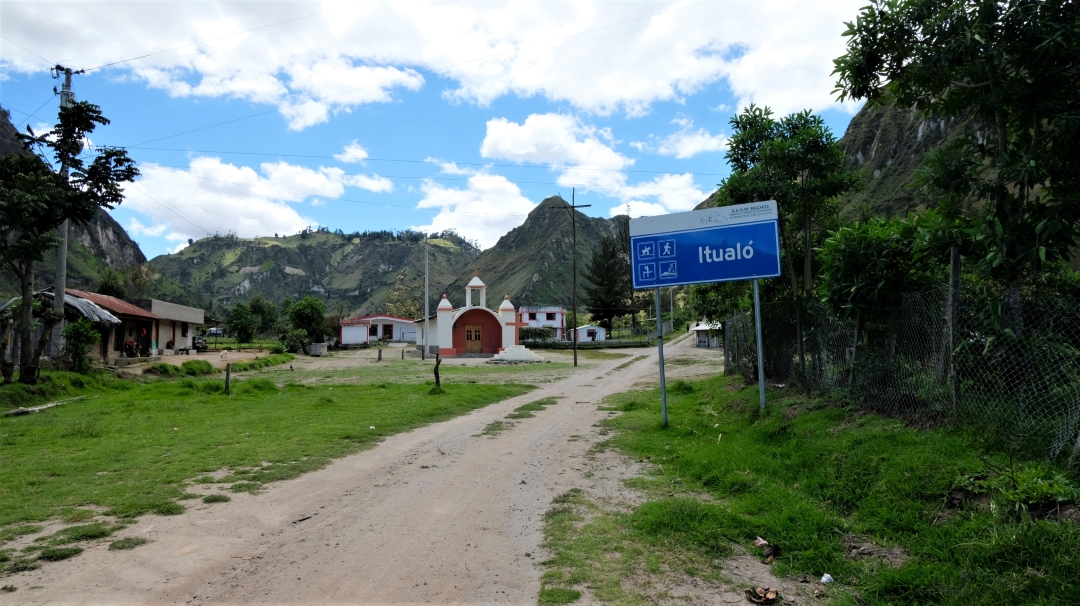
You’ll reach the small village of Itualo and see a small church. Turn right after the church, past the small thatched hut serving as a tienda and take the small uphill path. You’ll be walking uphill for 750m. It’s quite hard work!
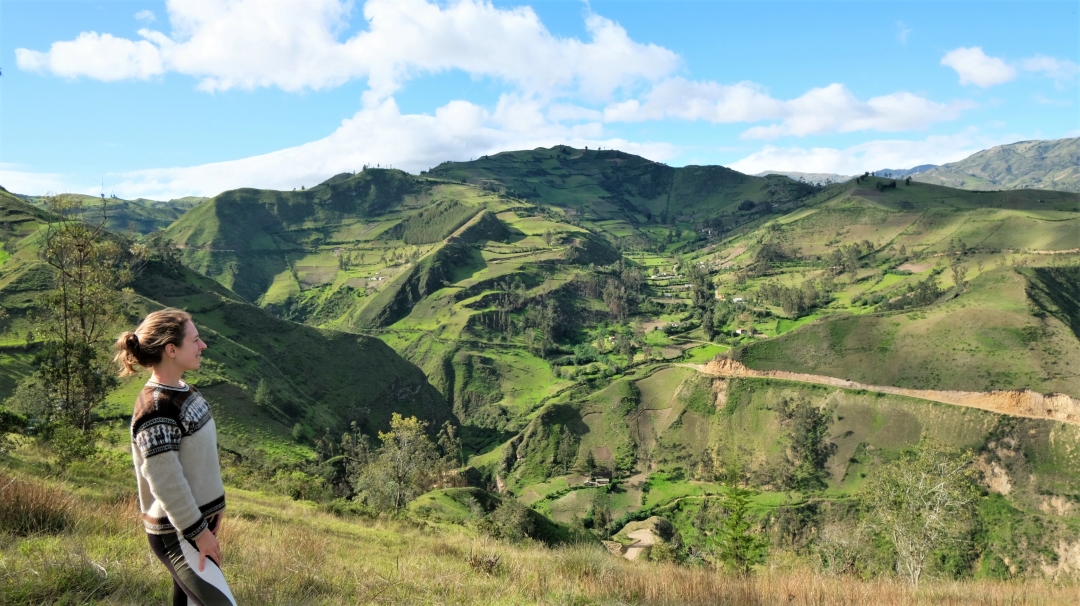
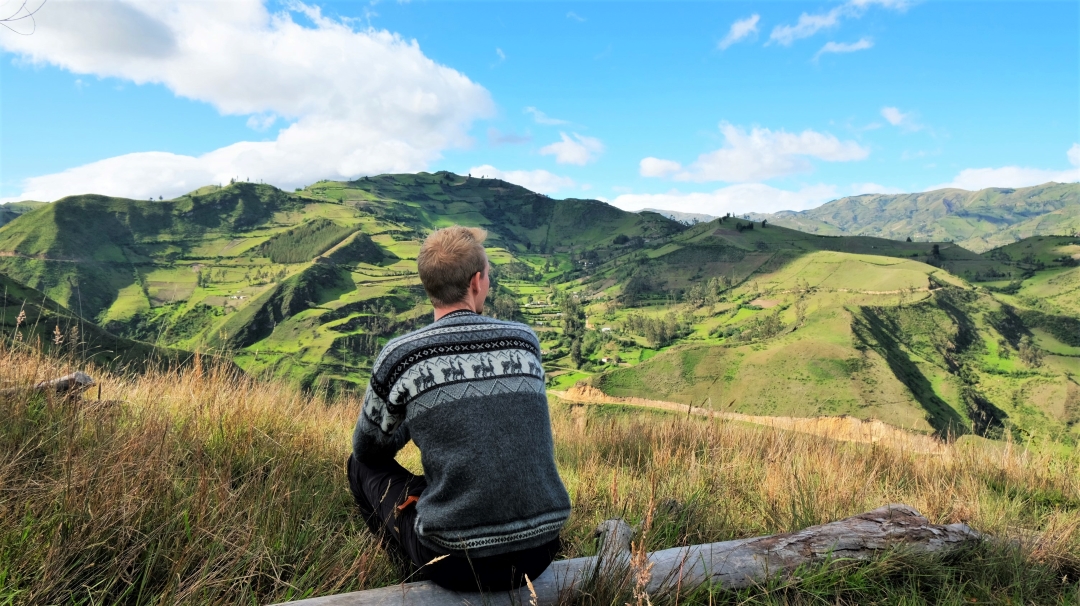
At the top of the hill, you’ll reach a junction. Take the trail leading south to Chugchilan (straight ahead) and follow it for 1.3km. You’ll pass a mirador (viewpoint) which is worth stopping by as it’s only 2 minutes off the path. This area is the best and most beautiful part of the second day’s hike and I’d recommend spending some time enjoying the view here. After this, you’ll be walking on the road and Chugchilan itself isn’t much to look at.
Eventually you will come out on an asphalt road. Turn left and walk on the road for 2.4km until you reach Chugchilan town centre. We stayed at the larger Hostal Cloud Forest which is in the centre of town.
Day 3: Hike from Chugchilan to Quilotoa (4-6 hours, 11.4km)
The last and most difficult day of hiking the Quilotoa Loop! Are you ready?
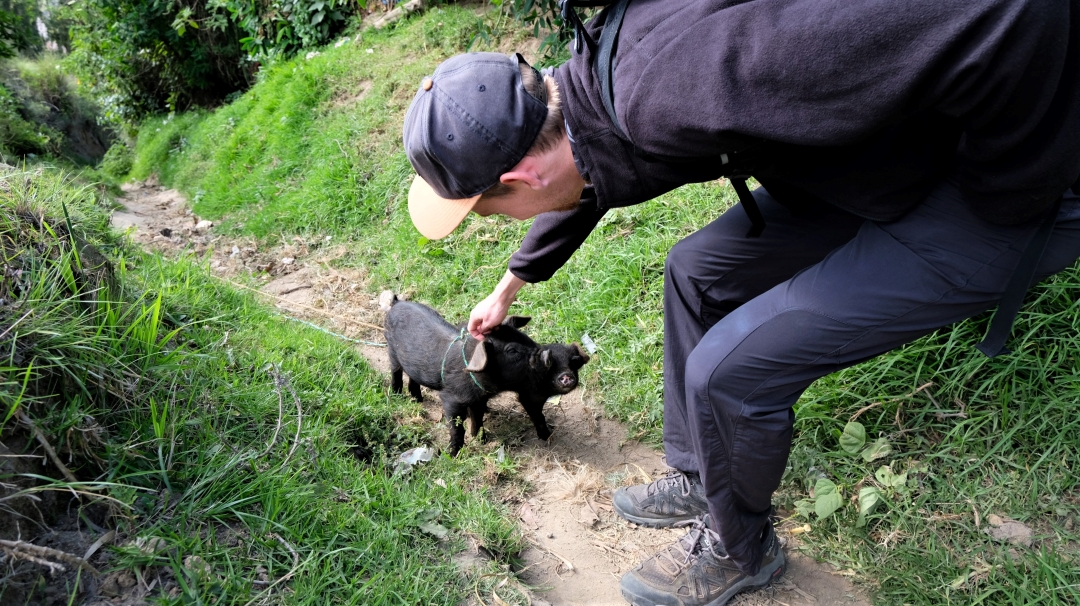
Pass the main square and church in Chugchilan. Turn left when you see the library on your left and take the track downhill. Follow the dirt road past Hostal El Vaquero. You’ll reach an intersection and can take a left to follow the road, or cut-through the trees on the downhill dirt path. We took the shortcut path and saw some piglets on the way.
After around 10-15 minutes following this route, you’ll see a yellow sign for La Moya/Quilotoa. At this point you may see a sign for the “extreme” or “adventurous” route. Don’t be tempted by this option. This route is now very dangerous due to landslides and it’s not faster than following the other route. Locals warn against taking the extreme option.
Follow the dirt road down to a small stream, cross it and take a small footpath to your right. You’ll reach the village of La Moya. Follow the road through the town looking for signs to Quilotoa. Follow the footpath to the canyon. This gorgeous, rocky canyon lined with lush green trees is worth a sit down to soak up the view.

You’ll see a waterfall and need to take the path down to the river. Cross the river and start heading uphill. Once you reach the top of this hill, you’ll come out onto the road that leads to Quilotoa. Turn left, following the sign that says Quilotoa. Walk uphill on the road towards the rim of the crater where the lake it. This is the steepest and hardest part of the Quilotoa Loop hike. There’s the option to stay on the road with a gradual incline, or to cut through the sandy verges between the roads.
Eventually you’ll come over the top and see the magnificent Quilotoa Lake! I thought this lake had just been photo-shopped to get that brilliant blue colour but it’s actually real! It’s an incredible view, and also incredibly windy up here. Don a jumper and buy a cup of coca tea from the lady brewing it on an open fire in her wooden hut. The hardest part of the trail is done now, but it’s still an hour walk to reach the end point at Quilotoa village.

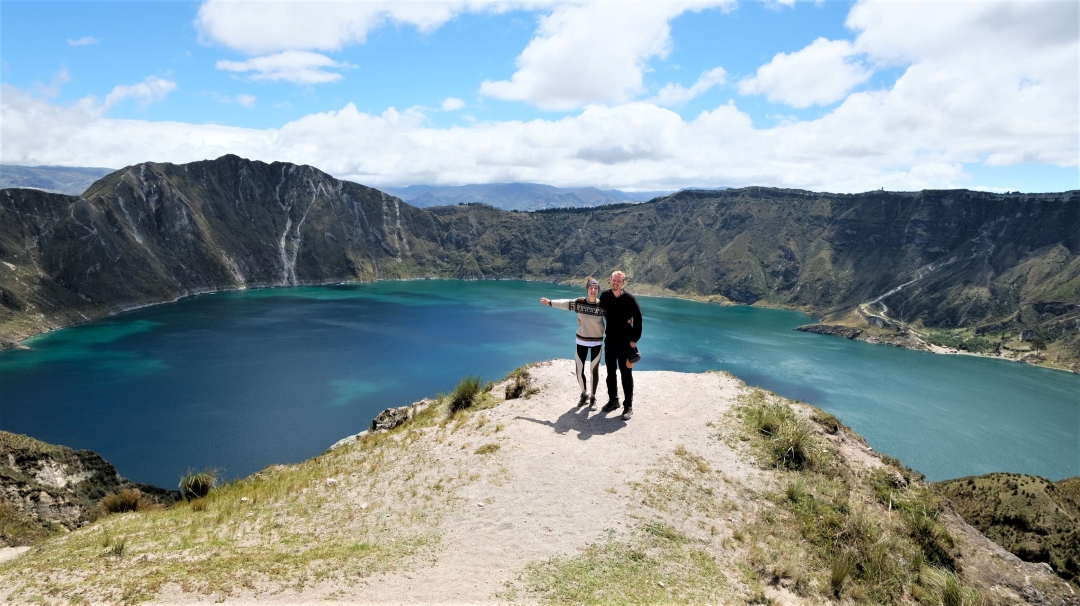
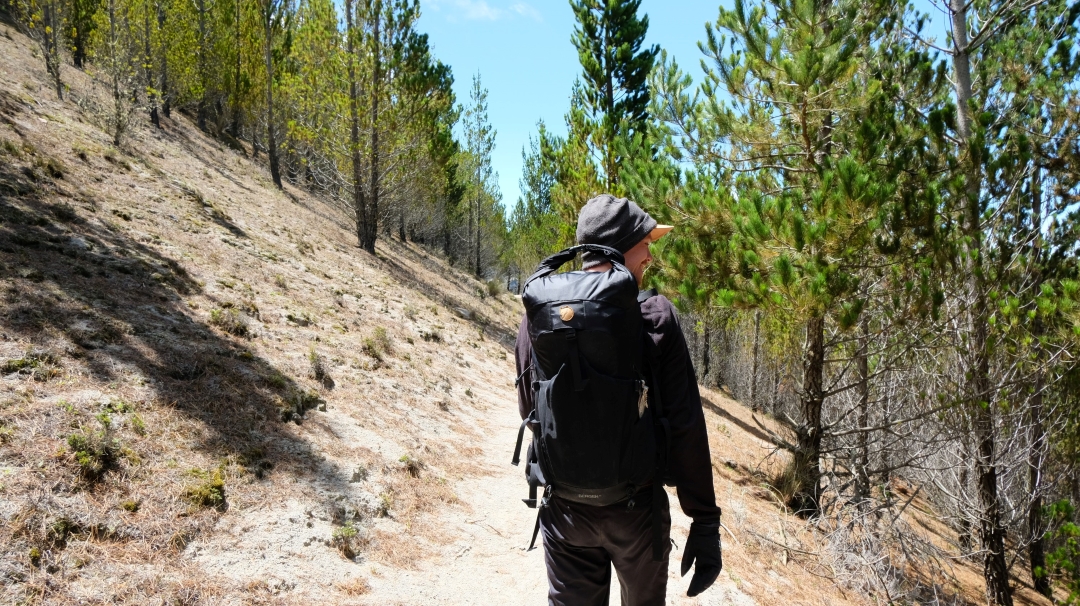
As you’re facing the lake, the path to the right takes 1 hour to reach Quilotoa. If you turn left, this path will take you 4 hours to reach the village. Turn right and follow the path to the right behind the rocky rim (so you cannot see the lake). You’ll find yourself walking through a pine forest and from here the route to Quilotoa is an obvious path. The path weaves in and out of the crater so you have mountain views to your right and crater lake views to your left.
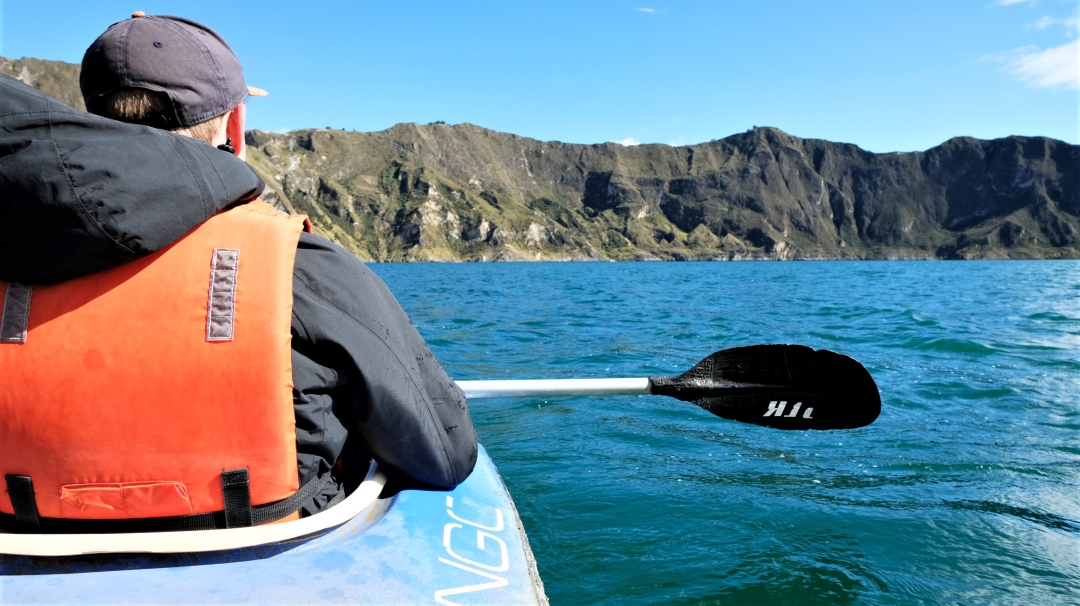
Congratulations, you total hiking champion! You’ll have reached Quilotoa village. Here you can either push yourself by heading down the path to the lake-side where you can kayak or slump down in a hostel and take some rest. We stayed overnight at Hostal Chukirawa and did the walk down into the crater the following morning for a paddle on the lake.
How To Get Back to Latacunga from Quilotoa
Once you reach Quilotoa, you can take a bus back to Latacunga from here. Buses go very frequently and the bus guys look out for travellers and call you over. Take the main road out of Quilotoa village towards the countryside road. You’ll pass Martita’s House Hostal on your right and the road will be straight ahead. Wait here for the bus to Latacunga. The bus costs $2 and takes approximately 2 hours. It’s a windy ride, so have motion sickness tablets ready.
Alternatives to Hiking the Quilotoa Loop
Other travellers we met decided the full 3-day+ hike wasn’t for them and instead based themselves in Isinlivi and took shuttles to do shorter day hikes and to see Laguna de Quilotoa. The latter option here is more expensive as the shuttles are private transport and are not commonplace on the Quilotoa Loop and you therefore pay a premium. However, if you’re not able or keen to hike it’s a great option.
If you start the hike but find you’re not able to finish it, speak to your hostel about the milk truck. The milk truck is a slow but cheap option for getting to the next village along. We met a guy who injured his knee on the first day coming down from the lake on the reverse loop. He jumped on the back of the milk truck from Chugchilan to Isinlivi for $1. It’s slow as it stops at all the houses but scenic.
There’s also the option to skip the 3-day loop hike and instead opt to do the hike around Quilotoa Lake (ironically not called the Quilotoa Loop despite being a loop around Quilotoa Lake). The hike is 6 hours and starts and ends in Quilotoa town. You can take a bus here directly from Latacunga.
What To Pack for the Quilotoa Loop Hike
Ecuadorian weather is changeable. It can be blazing sunshine and rain showers within just a few hours on the same day. You’ll need to pack light and practically as you’ll be carrying everything with you during the hikes. For specifics on what we pack, read our travel packing list. We recommend packing the following:
- Waterproof hiking boots
- Lightweight rain jacket
- Jumper x 1 (we found one jumper was enough to keep us warm and you can buy nice ones in Otavalo market)
- Hiking trousers or leggings, plus a pair of light shorts
- A t-shirt per day
- Enough pants and socks
- Swimsuit if you’re staying at Llu Llu Llama or El Vaquero
- Cap or hat
- Sun tan lotions (even on cloudy days there’s a high chance you’ll get sun burnt without it)
- Snacks (we brought dried fruits and nuts with us)
- Passports (you’ll need them to check-in at hostels)
- Book or Kindle (at the end of each day’s hike you’ll have some down time)
How Much Money To Bring for the Quilotoa Loop
There are no ATMs on the Quilotoa Loop and most hostels only accept cash. You’ll need to withdraw enough money at Latacunga before you take the bus to start the hike.
We recommend budgeting $30 per person per day. We booked our hostels ahead of time, so we knew the price we’d be paying. Breakfast and dinner is included within the room price, but lunch, snacks and any alcoholic drinks are not so you’ll need to bring extra for this.
- Bag storage: A $1 per bag per day at Hostal Tiana in Latacunga.
- Bus from Latacunga to Sigchos is $2 per person.
- Hostel room (including breakfast and dinner): $32-52 per night for a private double room. It’s possible to get dorm room beds for $15 per person. A 12% tax is sometimes added so be aware it may be additional to the price quoted on booking websites.
- Lunch: $3.50-$6.50 depending on if you opt to eat at a hostel or buy a pack lunch. You could buy snacks from a tienda for less. We often took bread from breakfast and made do with nuts and fruit.
- Drinks: $2.50-$5. A large bottle of Pilsner at a hostel is $2.50, craft beer is sometimes on offer for $3.50 and a glass of wine for $4.50-$5. A bottle of wine is $17-19.
- Kayaking at Quilotoa Lake is $3 per person for 30 minutes.
- Bus from Quilotoa to Latacunga is $2 per person.
If you intend to do activities such as visiting the cheese farm ($6 per person) or take private shuttles or book day tours through your hostel, you’ll need to budget more per day to cover these costs.
Safety tip! Though the villages on the Quilotoa Loop are widely considered safe, it’s not uncommon to hear of pickpockets on the bus to and from Latacunga. It’s recommended to always keep your bag on your lap on the bus, and not to use the overhead storage or put your bag under your seat. Keep your passports and wallet in a harder to reach place and not in your pocket. We split our money and carried a small amount in our wallet and the rest inside my sports bra.
Quilotoa Loop Hiking Tips
- Carry as little as possible and store the rest in Latacunga. You won’t want to be carrying a lot of weight during the hike, so the lighter you can pack the better off you’ll be.
- Bring enough money! There are no ATMs on the Quilotoa Loop.
- Start your hikes early (by around 9AM). Clouds and rain roll in by around 3-4PM, so you ideally want to reach your next destination by then.
- Chugchilan gets completely covered in cloud by 3-4PM (the name Cloud Forest Hostal gives it away). The fog is so heavy you can only see around 5m in front of you. Try to reach the village by 4PM at the latest.
- Slather on the sun screen and put on a hat. The clouds and wind can be deceiving and we saw many hikers (including ourselves) get sun burnt by underestimating the weather.
- Book your hostels in advance. The best hostels get booked up and to be honest you won’t want to traipse around looking for a hostel when your legs are tired at the end of each day of hiking.
Christmas on the Quilotoa Loop
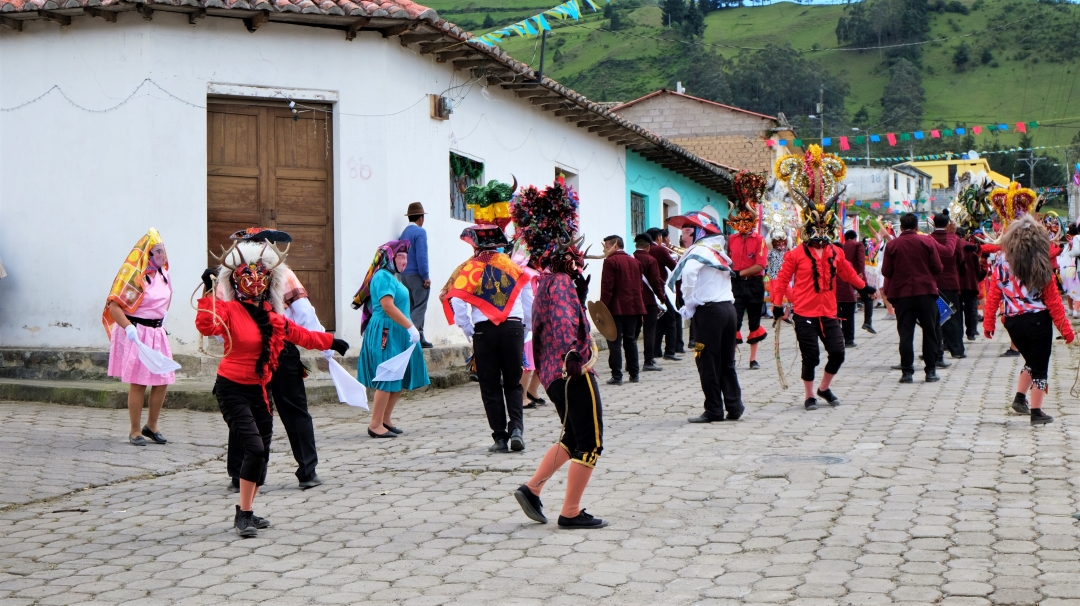
Hiking the Quilotoa Loop is a great way to spend Christmas! We hiked during the Christmas period and all the hostels were still open, though some tiendas were closed on Christmas Day and Boxing Day. Isinlivi is the hub of Christmas celebrations, which start on the 23rd and go on until the 27th. We had expected some quiet nights in these rural villages but Isinlivi was buzzing!
Ecuadorians come to Isinlivi from the surrounding villages to celebrate Christmas, bringing mattresses on buses to stay overnight in the houses here. On Christmas Eve, locals dress up in costumes and play trumpets and drums in a Christmas parade that goes through the village multiple times. By night, there’s a fun fair with a death-trap contraption that splays fireworks in all directions being lit up continuously (it’d never pass health and safety regulations in Europe).
Chugchilan and Quilotoa are quieter and don’t have the same level of Christmas celebrations as Isinlivi. However, there are plenty of hikers trekking Quilotoa over Christmas, so you’ll still meet people on the way.
LIKE IT? PIN IT!